前言
项目中遇到过的问题:通过 前端 Vue 或者后端Java 实现对监控的实时预览播放,截图等,刚开始肯定是没有头绪,通过多方面的查找和验证,就有了这篇文章。
提示:以下是本篇文章正文内容,下面案例可供参考
一、webrtc-streamer是什么?
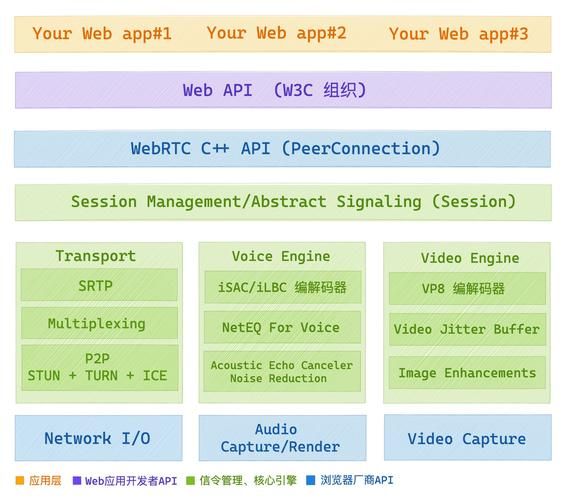
webrtc-streamer是一个使用简单机制通过 WebRTC 流式传输视频捕获设备和 RTSP 源的项目,它内置了一个小型的 HTTP server 来对 WebRTC需要的相关接口提供支持。
二、使用步骤
1.下载webrtc-streamer,本机测试我下载的最新window版本
下载地址:https://github.***/mpromo***/webrtc-streamer/releases
2.解压下载的安装
3.双击webrtc-streamer.exe启动服务
如下图则启动成功,此时在浏览器访问127.0.0.1:8000可以看到本机监控画面
当你同时打开多个视频流/访问窗口时,会发现本地CPU会快速上涨,cpu太高的话打字都非常卡。所以在cmd里命令启动exe时,需要加上这个配置参数 -o
4.将下载包html文件夹下webrtcstreamer.js文件和html/libs文件夹下adapter.min.js文件复制到VUE项目public目录下 、在index.html文件里引入这两个js文件
5.编写测试页面
注意:第三步在本机启动服务所以 new WebRtcStreamer(id,serverUrl)中URL传入127.0.0.1端口可
见第三步截图为8000;各监控设备厂商有自己的RTSP地址格式connect要传入正确的rtsp地址。
<template>
	<div>
		<a-button @click="handleChange">切换</a-button>
		<video id="video" autoplay width="900" height="900"></video>
	</div>
</template>
<script>
export default {
name: 'index1',
data() {
	return {
		webRtcServer: null
	}
},
mounted() {
	//video:需要绑定的video控件ID
	//127.0.0.1:8000:启动webrtc-streamer的设备IP和端口,默认8000
	this.webRtcServer = new WebRtcStreamer('video', location.protocol + '//127.0.0.1:8000')
	//需要查看的rtsp地址
	this.webRtcServer.connect('rtsp://user:password@ip:port/cam/realmonitor?channel=1&subtype=0')
	//rtsp://user:password@ip:port/h264/ch1/main/av_stream--海康
	//rtsp://user:password@ip:port/cam/realmonitor?channel=1&subtype=0--大华
},
beforeDestroy() {
	this.webRtcServer.disconnect()
	this.webRtcServer = null
},
methods: {
	handleChange() {
		this.webRtcServer.connect('rtsp://user:password@ip:port/h264/ch1/main/av_stream')
	}
}
}
</script>
<style scoped></style>
6.运行项目可查看监控视频播放效果
以上为本机测试webrtc-streamer实现实时视频播放效果的全过程,后续还要验证服务器运行服务、局域网公网访问以及性能等。
7.另外把页面放到初始(根目录)公共页面(app.vue)可实现不登录的实时检测
8.关于截图的部分代码,有需要的可以参考
 <a-button  class="taglist"  @click="captureScreenshot">截图</a-button>
  //定时监听
      setTime(){
        //每隔2秒进行截图
       this.timer = setInterval(()=>{
         this.captureScreenshot();
       },10000)
     },
//截图的点击事件
    captureScreenshot() {
      for (var i = 0; i < this.number; i++) {
        var videoElement = ''
        videoElement = document.getElementById('video' + i)
        this.windowip=videoon.ip
        console.log(videoElement.ip,"1234")
        if (videoElement.biaoshi == 'videoplay') {
          console.log('截图j', videoElement, i)
          const canvas = document.createElement('canvas')
          canvas.width = videoElement.videoWidth
          canvas.height = videoElement.videoHeight
          canvas.getContext('2d').drawImage(videoElement, 0, 0, canvas.width, canvas.height)
          this.screenshot = canvas.toDataURL()
          console.log(this.screenshot, '123')
          var shijian = new Date()
          console.log(shijian)
          // this.base64ToImage(this.screenshot,'shexiangtou'+shijian+'.png')
          this.base64ToImage(this.screenshot, 'shexiangtou' + shijian + '.png')
        }
      }
      //  console.log("截图",videoElement)
    },
    //上传截图
    postImg(base64Str, filename) {
      var imgData = {
        serialNumber: '01',
        base64: base64Str,
        ip: this.windowip
      }
      // console.log(imgData,"imgdata",base64Str,imgData.base64Str,"wozoul")
      // return
      postAction(this.url.vueScreenSendAndPython, imgData)
        .then(res => {
          if (res.su***ess) {
            this.$message.su***ess(`保存成功!`)
          } else {
            this.$message.warn(`保存失败:` + res.message)
          }
        })
        .finally(() => {
          this.loading = false
        })
    },
    //下载截图
    base64ToImage(base64Str, filename) {
      var that = this
      console.log(base64Str, filename, '我走了下载')
      const img = new Image()
      img.src = base64Str
      img.onload = function() {
        const canvas = document.createElement('canvas')
        canvas.width = img.width
        canvas.height = img.height
        const ctx = canvas.getContext('2d')
        ctx.drawImage(img, 0, 0)
        // 如果需要将图片保存到文件,可以使用以下代码
        that.getlick = document.createElement('a')

        that.getlick.href = canvas.toDataURL('image/jpeg')
        that.getlick.download = filename || 'image.jpg'
        // that.postImg(that.getlick.href,filename)

        that.getlick.click()
        // 如果只需要在页面展示图片,可以将以下代码取消注释 //
        // document.body.appendChild(canvas);
      }
    }

    //  // 使用示例
    //  const base64String = 'data:image/png;base64,iVBORw0KG...';
    //  // 替换为你的Base64编码字符串
    //  const filename = 'image.png';
    //  // 可选的文件名,如果不提供,默认为
    //  'image.jpg' base64ToImage(base64String, filename);
9.部分用到的参考文章简介
1、各种服务端(如 linux / windows 等)都有介绍的比较全的版本推荐:参考链接
2、结合使用的文章参考:参考链接使用VUE和webrtc-streamer实现实时视频播放(监控设备-rtsp)_vue.js_脚本之家 (jb51.***)
3、cup占用过高处理参考:参考链接
总结
以上就是今天要讲的内容,本文简单总结了自己使用过程的一些知识点和VUE和webrtc-streamer实现rtsp实时监控的一些步骤,希望可以帮到你。

